Project #1: "Good" and "Bad" Design Critiques
What?
Bring in two designs that you did not create, one you think is especially "good" and one you think is especially "bad." The two designs you choose may be a still frame of
a film,
website page, album cover, flyer, logo, even facial surgery (e.g. the brief history of Megan Fox's face), etc. We will
go over these in class and each student will briefly discuss
(around
a minute) why they consider the designs they have chosen as "good" or "bad".
Why?
Because our notion of "good design" varies
according
to taste, mood, age, etc., this is an exercise in search of
common attributes
of good design. Critique and participation are mandatory skills used and developed throughout the class, and this provides students a chance to get your feet wet in these areas.
Project #2: Image Archive
What?
Build an archive of digital images that strike you in some way as interesting, repulsive, inspiring, etc., as you conduct online research or take reference photographs. By the end of the semester you should have a rich and robust archive. It should be organized in a folder structure that is easy for you to quickly access images when needed. Folders such as food ads, fashion, music-related, propaganda, cheesy, technological, etc., are some obvious ones. This section can include a list of links to pertinent websites if you wish.
Why?
The more diverse and comprehensive your influences and inspiration are, the more versatile and agile you will be as a designer. It's easy to make designs that YOU like but you need to be able to design in ways that OTHER PEOPLE will like, the best way to get started is to build up a familiarity with a range of work that is outside your natural interests.
Notes:
Let's say that, for whatever reason, you want to create a graffiti art inspired design, don't just look at images of graffiti artist/designers but also look at their influences. In other words, go to your source's sources. For example, what are the influences of Shepard Fairey?: Government propaganda, civic posters, 60s black power movement, political avant-garde, etc. Think about his sources with regard to the purpose of his work and his brand. Why might these be his influences? One way to make "anti-institutional" art is to take institutional art and subvert it. Consider that such irony is the logic behind Shepard Fairey's "Obey" campaign.
Project #3: Creativity Archive
What?
Obtain a sketchbook at least 8.5 x 11 inches, tape, and your choice of drawing materials, ink or paint--whichever analog drawing instruments you like. This is the complement to the image archive. Keep and collect all the sketches you make for this class throughout the semester. At the end of the semester I will collect and review these books to make sure that you have funneled a lot of creative energy into it. Feel free to paste images in this book. If most of your sketches and image-making is done digitally (are native digital images created in Photoshop, etc.) then feel free to use or open a Flickr account to collect these images.
Why?
A good reason for such a book is that it will serve as an archive of good ideas that you can use later. More importantly, however, is that having an archive like this enables you to trace your personal development and gain some objectivity toward your own work. For example, it is easier to be critical of an image you drew a month ago than an image you drew yesterday. This book will help you get a handle on yourself as you grow as a designer, learning about your own skills and weaknesses.
Project #4: 100 Thumbnail Compositions
Thumbnail Composition Template (JPEG format)
Thumbnail Composition Template (Photoshop format)
What?
Create 100 black and white compositions roughly measuring 1 x 1.6 inches (the Golden Ratio). You will be graded in how consistently you can create various and interesting compositions. The compositions will be abstract representations of topics. Some compositions will be digital and the rest will be analog.
Digital Component:
64 of the thumbnail compositions should be digital. These will include 8 categories with 8 examples of each: weak, strong, slow, fast, synthetic, natural, family, and software. Use the Photoshop template provided.
Analog Component:
36 of the thumbnail compositions should be sketched, inked out, cut out, etc., whichever physical materials you prefer, but should not be digital. There are 4 categories: chaos, order, war, and peace. There should be 9 examples of each totaling 36. Try to minimize the use of grayscale and keep the values true black and true white in all of the compositions.
Why?
You will need to provide thumbnail sketches of almost every assignment throughout this class. Idea creation through sketching is the most important step in the design process. It is about building a good quantity of design choices, a broad selection of directions, that the final design will take. The more ideas you have to begin with, the more freedom and agency you will have throughout the rest of the design process. The goal is to keep your mind flexible and open, to not get into design ruts too early where you "fall in love" with a particular idea that might prevent you from discovering an even better design solution.
Project #5: Logo and 64 Logo Thumbnails
What?
Create a digital black and white logo using Illustrator. It can represent a business, organization, or represent you personally. Along with the logo itself, you must say what/who the logo is for (it may be a for a hypothetical company, if you want, but you have to provide a bit of background of who the company targets, and what services or products they offer).
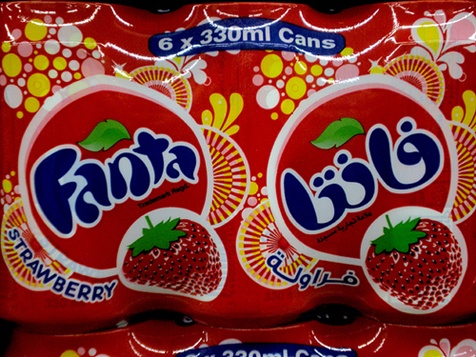
You must provide 3 concepts or emotions that you want the logo to convey. For example, the Fanta logo conveys "fruity," "bursting," "fun," "bold." For the project you can't use "simple" as a concept/emotion that your logo conveys (or "simplicity," "clear-cut," "basic," etc.), because this is true of most logos.
Thumbnail Composition Template (JPEG format)
Thumbnail Composition Template (Photoshop format)
You must also provide 64 diverse and interesting thumbnail sketches you created during the brainstorm and planning process. If you have less than 64 thumbnail sketches, you will not receive a grade for the project, as it is incomplete. Although you may create and present a color version for the class critique, you must also provide a black and white version, from which your grade will be determined.
Why?
A logo is one of the most basic, but important and powerful (packed with meaning), designs to create. The Logo project further develops your skills of sketching design ideas that you used in the 100 Thumbnails project. The reason for the black and white constraint is to force attention to form and shape, because these are more fundamental to design than color.
Project #6: Book Cover and 32 Color Thumbnails
Thumbnail Composition Template (JPEG format)
Thumbnail Composition Template (Photoshop format)
What?
Design a book cover for any book you wish: a children's book, a thriller, a classic, etc. You must redesign the cover from scratch. You may not iterate on an existing design. Totally rethink it. The design should appeal to a contemporary audience. You must provide a synopsis paragraph describing the book (the synopsis you can copy from Wikipedia, Amazon, or another source). You may use Illustrator or Photoshop, or a combination of both, to create the design.
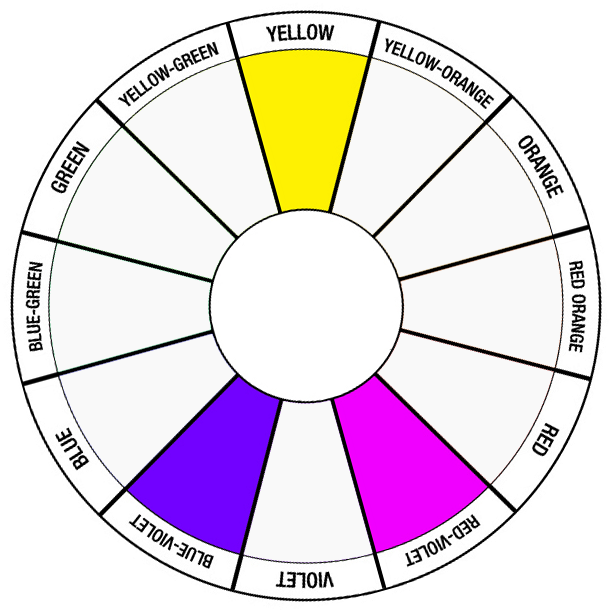
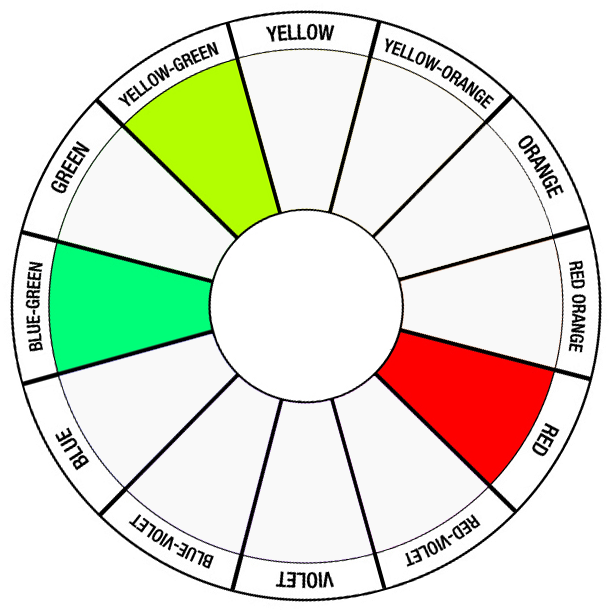
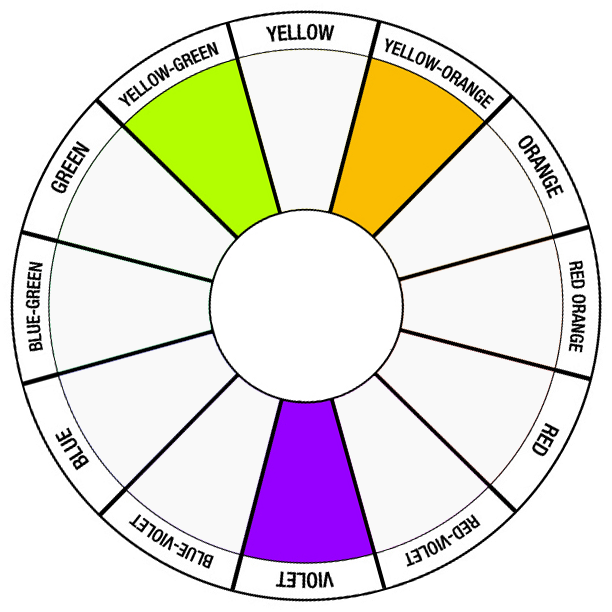
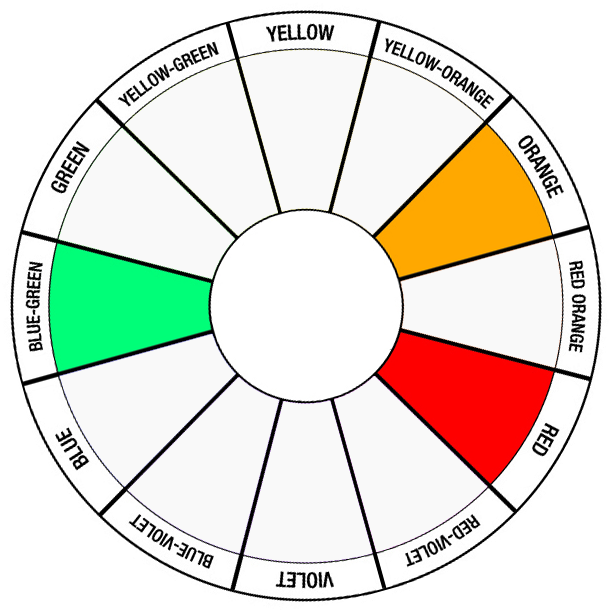
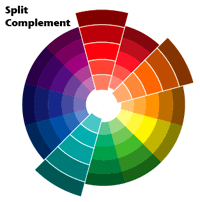
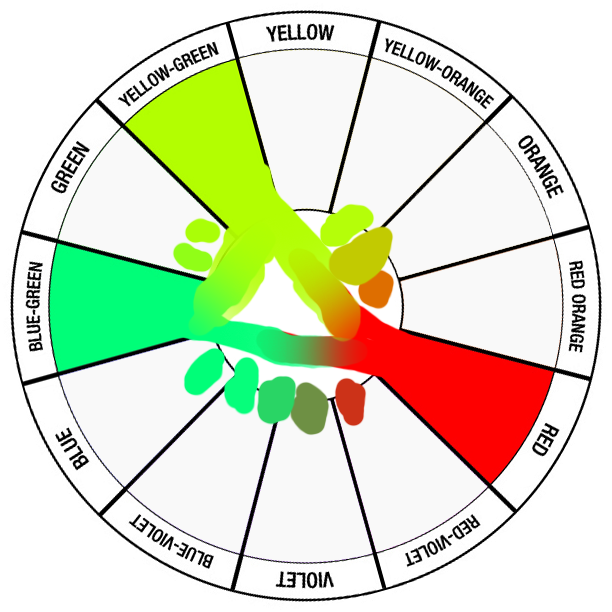
You must use a split complement color scheme. Here's an online tool to generate a split complementary color scheme (among other schemes).
Here are some examples of split complement schemes:
 ___
___
 ___
___
In addition, you may also use white and black. You can also add white or black to any color to get a new tint or shade. Here is an example of adding white to the colors to get various tints:
You can also mix your colors together to get new colors (likely muddy browns, purples, greens). For example:
I mixed these colors in Photoshop by creating overlapping layers of different color. Erase or adjust the transparency of the top layer and the hues will visually mix. Use the eye dropper tool (the color picker) to select the "mixed color."
You must also provide 32 diverse and interesting color thumbnail sketches you created during the brainstorm and planning process. The 32 thumbnails can be digital or analog, or a combination of both. If you make the thumbnails in analog format you can use whatever you implements want: colored pens or pencils, crayons, markers, paints, etc. If you have less than 32 thumbnail sketches, you will not receive a grade for the project, because it will be incomplete. If you provide more than 32 thumbnails, even if they are in black and white, those will count as extra credit toward the project.
Why?
Contrary to the saying, people really do judge books by their cover, at least partially. Consider this a more complex kind of logo design challenge. Book covers that are well designed will pass the "glance test"---not only will the cover catch your attention, but it will also powerfully and quickly evoke the thrust and mood of the book.
Regarding the color constraint (of split complements), designs are almost always constrained by external factors. For example, let's say you are working at a small game company and you are suddenly charged with designing some menu buttons for the game. You could use the game's existing color palette as a starting off point to get some ideas. It is essential that you can still feel creative and be creative while working within certain color constraints.
Help?
Here is a good introduction of color theory, recapping what we went over in class, such as various kinds of harmonious color schemes. Here's a bit of info on split complements.
Project #7: Propaganda Poster & 32 Color Thumbnails
Thumbnail Composition Template (JPEG format)
Thumbnail Composition Template (Photoshop format)
What?
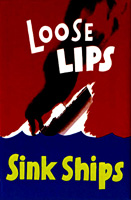
Create a color propaganda poster measuring 9" by 12" inches (it can be either vertical or horizontal) using either or both Photoshop or Illustrator. Propaganda is the deliberate attempt to shape perceptions, manipulate thought, and direct the behavior of the audience to advance the designer's agenda. Propaganda selectively uses strong images and loaded messages to produce an emotional and irrational, rather than rational response, to the information presented. The term "propaganda" has a negative connotation in our culture, although our media landscape is saturated with it, some of which you may support, some of which you may not:

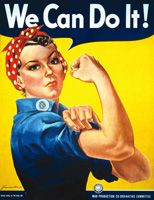
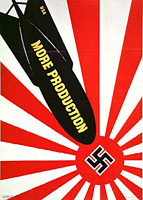
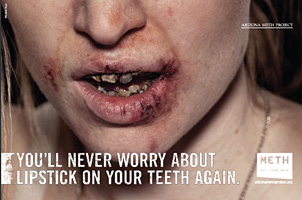
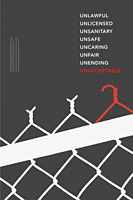
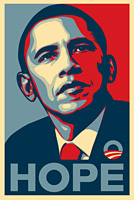
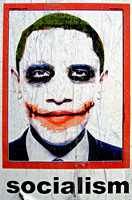
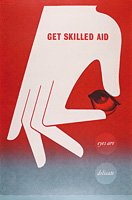
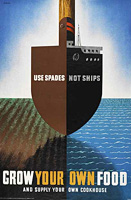
For your poster, you may choose whatever subject of propaganda that you wish, for example: anti-abortion or pro-life, for or against the consumption of meat, pro or anti military, etc. You are trying to cause a strong emotional response, manipulate thought, and direct people's behavior. In other words, you should make a real propaganda poster (like those above). Do not just design a poster in the historical "propaganda style" like these below:
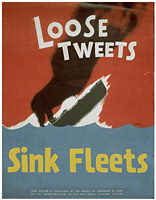
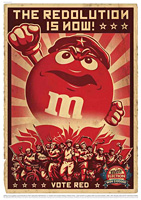
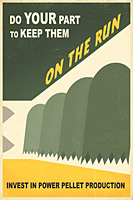
These are not propaganda, but are just jokes or advertising because they humorously deflate strong, irrationally positive or negative emotional responses.
You must also provide 32 diverse and interesting color thumbnail sketches you created during the brainstorm and planning process. If you have less than 32 color thumbnail sketches, you will not receive a grade for the project, as it is incomplete.
Why?
Propaganda is the most extreme form of design. Where most designs attempt to manipulate or assist us in subtle ways, propaganda pulls no punches in its attempt to manipulate the viewer through the design elements of form, color, image, juxtaposition, typography, and so on. Just as the logo allowed you to exercise skills in creating the most basic kind of design, the propaganda poster will enable you to exercise skills in an extreme form of design. By making propaganda, you will become more aware and critical of propaganda when you see it in everyday life.
Project #8: Celebrity Caricature Assemblage, 24 Photographs, and 2 Pages of Brainstorming
What?
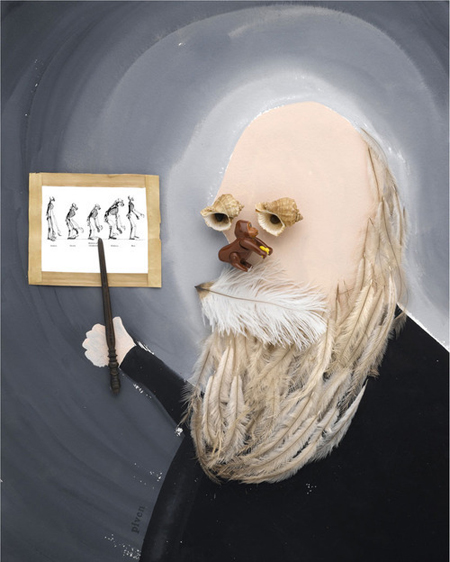
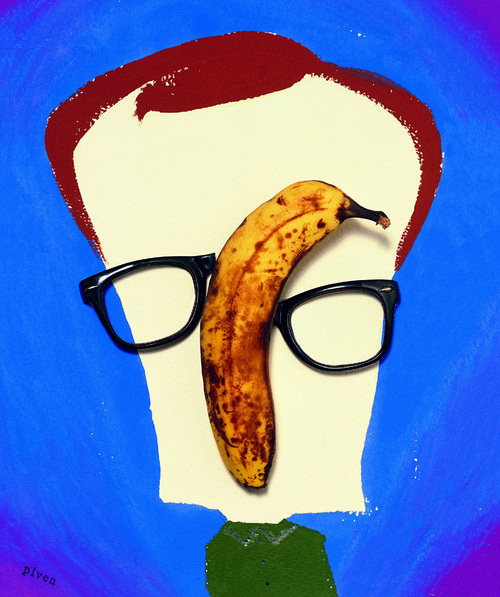
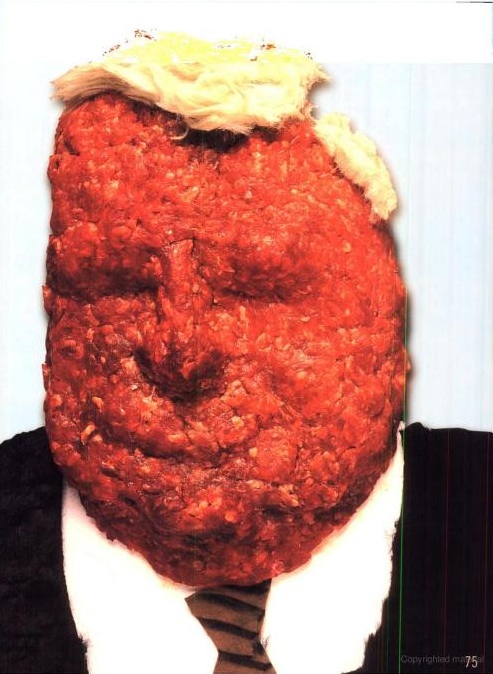
Design and construct an assembled caricature of a famous celebrity. Your celebrity can be famous for anything: politics, music, science, etc. The caricature must be analog, not digital. A digital photo of the final caricature will also be due so we may look at your work on the projector.
Hanoch Piven is one of the best caricature assemblage artists, so study his work and process. Here are caricatures, website, blog, book, and a bio. Click on images for larger versions:

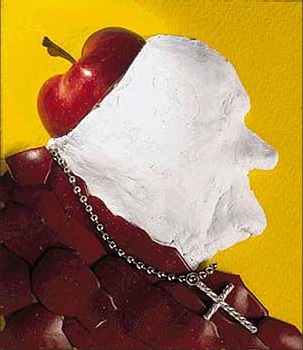
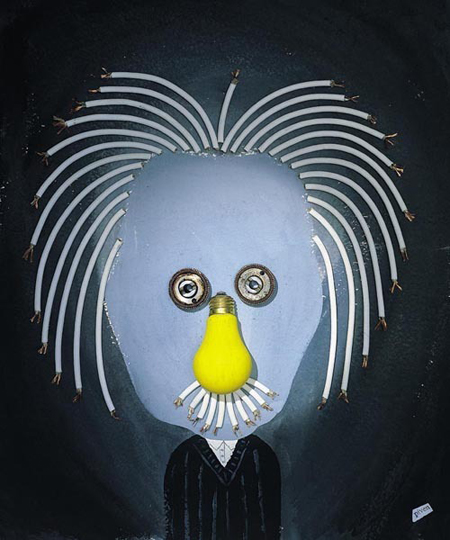
Must Use Paint:
You must use at least one kind of any color paint somewhere in the assemblage. Acrylic is probably the easiest paint to work with because it dries fast. Acrylic paint is also relatively cheap. Other paints to consider are watercolor or gouache (these are more expensive, however). You can use as many colors, and as much paint, as you wish.
Must Use Thick Backing:
You must use a thick, sturdy backing to serve as the support of the assemblage. You can use thick, clean-looking cardboard, thin wood or masonite, or thick foamcore. You can get this at an art supply store. Or, you can cut out the side of a cardboard box if the surface is sturdy enough to support your object(s) and is clean. It can be any color. Use whatever backing that will show off your caricature best.
Must Include a Found Object:
You must integrate at least one found object. The object can be anything from a can opener, bullet casings, feathers, cheese, etc. If you want to include more than one object, that's fine.
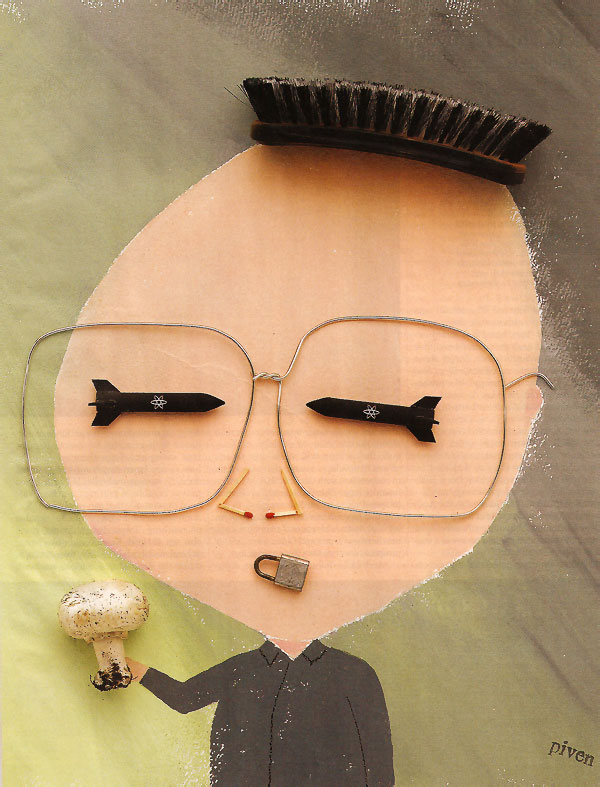
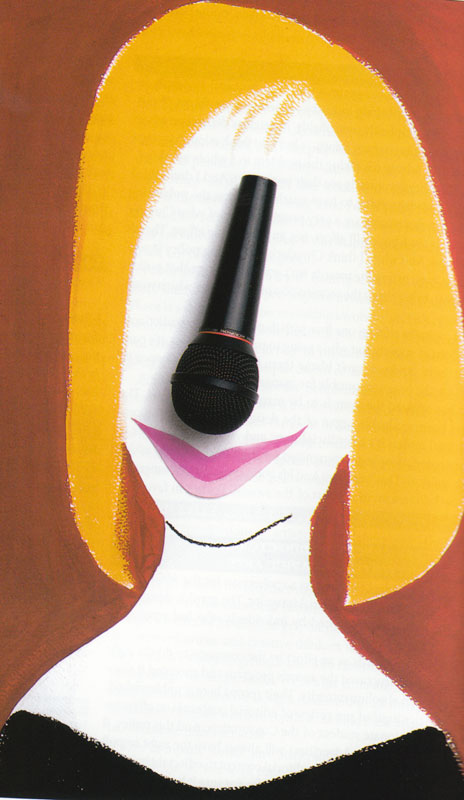
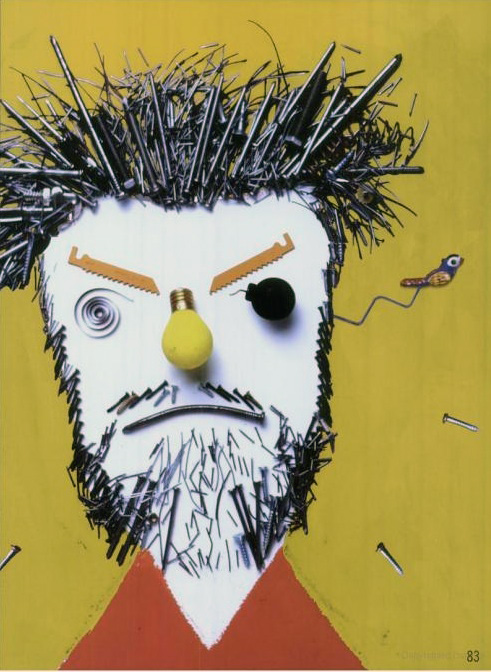
Part of your grade will be rewarded for being as clever as possible in using MULTIPLE CONNECTIONS between the found objects and your celebrity. For example, notice that in Piven's caricature of Barbara Streisand above, he uses a microphone to represent her nose. That kills two birds with one stone: capturing the large size of her nose and the fact she is a vocalist singer. The caricature on the right is Ted Kaczynski (the Unabomber), the crazy look of the hair and beard are also literally referencing the shrapnel and bomb materials he used.
Rummage through junk drawers, go dumpster diving, go to Goodwill, go to garage sales, etc., to find some good stuff to brainstorm with:

Putting it all Together:
Use some kind of glue, adhesive, or wire, etc., to hold the work together but do not allow the glue or wire to show because it will look crappy. Only allow the glue, wire, etc., to show if that is symbolically important to your caricature. Craft is very important. Just like the logo assignment, every detail of your caricature should help evoke the celebrity.
The folks working at Michaels, Sam Flax, or even Home Depot, are an excellent resource. For example, if you need to know which adhesive will best attach plastic into wood for your project, ask an associate for advice. I call them all the time and ask questions like that, they are trained to help you.
Where to get Caricature Assemblage Supplies
Size and Fragility of Assemblage:
The assemblage should measure larger than 1 foot by 1 foot and smaller than 2 feet by 2 feet. If the assemblage is too fragile to hang on a wall, that's fine; it can lie flat on the table.
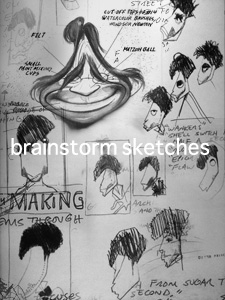
2 Full Pages of Brainstorming and 24 Digital Photographs:
Record your development process of making the caricature. 2 full pages of brainstorms with sketches and comments are due along with the final project. Take 24 digital photographs of different configurations and iterations of your caricature as you play with the materials. For the photos, swap out different objects for the eyes or mouth; alter the shape of the head; play with placement of features; try different levels of exaggeration of chin, cheeks, forehead, hair, etc.
 --------
Why?
Playing with physical materials is a vital way to get inspiration for many successful digital designers and artists. It is necessary to go through the process of actually designing a work with physical materials to understand the benefits that those materials provide. Odd and surprising textures, the shapeliness of objects, weird ways plastic bends, even the smells of the collected materials can lead to interesting ideas that would not have arisen if you just sat in front of a clean and ephemeral computer monitor. The "problems" that arise from gluing everything in a way that is aesthetically polished, for example, helps us to appreciate the materials in an experiential and embodied way.
Project #9: Professional Portfolio Website and 3 Full Pages of Brainstorms and Flowcharts
What?
Design and implement a professional portfolio website advertising yourself to future employers or as a freelancer. Use Dreamweaver to create the website. If you already know HTML, Flash, or another software package with which you could make the portfolio, you may use that. You will be graded on how well the portfolio website shows off you and your work. Strive for clarity, accessibility, and distinction. You must include your resume in your portfolio, either as its own page, or available as a downloadable PDF document. You will not be graded on your resume design, but it must be available through the website or your portfolio will be marked incomplete.
If you have never created a website I STRONGLY SUGGEST that you work on your portfolio website in the MULTIMEDIA CENTER in the main library because there are experts there that are paid to help you.
Four Portfolio Sections
Your portfolio must have at least FOUR pages (or areas) that will serve as section categories. Consider using the work you have made for this class as a section showing off your graphic design skills. Consider using the work you have made in other classes for other categories. For example, if you want to be a game designer, list some of your best game prototypes, along with descriptions and images from them. If you have video captures from games you worked on, get a YouTube account and embed these videos into the appropriate page in your website. You may want to include a section for a hobby which has interesting media (for example, personal photography, videos of LARPs).
Brainstorms and Flowcharts
3 full pages of brainstorms, along with your notes and flowcharts, are due along with your portfolio website.
Optional Stuff
You may want to purchase a domain name based on your first and last name, such as www.JaneDoe.com or www.JaneDoeProgrammer.com, and actually upload your website to the internet. You should also seriously consider registering accounts using your first and last name with Facebook, Twitter, YouTube, Vimeo, Flickr, and so on, to reserve those spaces in case you want to expand your online presence in the future.
Why?
We live in a visual culture, and increasingly, an online and networked culture. Employers, clients, and people you will collaborate with in general, will increasingly form judgments about you according to your online presence. Use this opportunity to apply your growing design skills to shape and produce your online image in the best and most expressive light that you can. Because of its potential real life consequences, this may be the most important project you complete in this class. All of your serious competition from other schools looking for new media jobs or freelance work will have a stunning online presence, and so should you.
Project #10: Freestyle Project Plan and Pitch
What?
This is the first half of your final Freestyle Project. This half consists of your pitch and plan for the final project. The nature of the final project is entirely up to you, but you must plan to use interactivity in some way. The project could be a website for a game company you are launching, a web comic, an Interactive Fiction piece, a net art project, a series of character concept art for an imaginary sci fi film, and so on. The visual design is the most important part of the project, so spend most of your time on making it look as polished as possible. For example, if you choose to make an Interactive Fiction piece, you will not be graded according to how fun it is or how brilliant the game mechanics are. You will be graded primarily on its visual design.
You will elevator pitch your final project to the class for one-minute and receive several minutes of feedback. Prepare sketches, concept art, source material and inspiration, flowcharts, color palette, etc. for your pitch. Subject to approval by the instructor, you will develop your pitch into a finished product due the last week of the semester.
Group projects are acceptable, but are subject to approval. Remember that the quality and quantity of work expected of a project increases with each additional student involved. It is advisable to group two complementary talents together, such as a more artistic student with a hardcore programmer.
Why?
Self-direction is the third most important big lesson to learn in the design process (sketching out many ideas is the most important, and iterating on your designs is the second most important). What have you always wanted to design? What inspires you as a designer? Tap into what you fear or what you desire and allow the design skills you have developed in this class to explore those sources of inspiration. Which images have you gathered in your Image Archive (Project #2) that fascinate or haunt you? Why are those image so provocative to you? Discover what can deeply motivate and feed your process as a designer.
Project #11: Freestyle Project Final
What?
This is the second half of your final Freestyle Project. This half consists of the completed form of the final project. The goal and nature of this final project was pitched by you in Project #11. It is up to you to get feedback on this final project and integrate it into your process. The feedback should be visible in your final design. You will be graded according to this breakdown:
1/3 of Grade: How well you executed your plan.
1/3 of Grade: How well you designed your final project.
1/3 of Grade: How well you addressed or incorporated criticism.
Why?
Plans and ideas are only any good if they can actually be realized in a final design. Was your scope too big? Was your idea deserving enough? Was it too unfocused or confused? This project brings in everything that you have learned so far in design production. It gives you a chance to conceive of a design goal, sketch out many solutions, plan one solution, execute on it, get feedback, iterate using that feedback, re-execute a design solution, and get final feedback. Replicate this cycle in the future when you want to design something!